Sunday, November 26, 2017

Hello Daydreamer-Pretty Little Studio DT

Good morning everyone!! 
Im Here to share another layout with you and this time I'm using the With All my Heart collection.
I started my layout with a picture in mind, the one shown above. It was my youngest daughters birthday, we had a little party for her and she had a blast. We ate cake and did presents and after that we turned the sprinkler on and played in it.
I had picked the collection to use and decided I wanted to use circles as my focus on this layout. I I went to punching them out.

I chose a paper for my background and covered it with a sheet of vellum, to soften it up. I chose where I wanted my photo and went to laying out where I wanted the little circles in all the pretty colors and patterns.
Then I went on to deciding what was going to go behind my photo. I knew I wanted to use a doily, so I added that right off the bat. Then went in and grabbed my floral die-cuts, some labels and a tag and started layering.

Finishing off my layout, I grabbed a die cut word and added some of my silver glitter thickers and added my title to the bottom left of my layout. I tucked in a few heart die-cuts and a few more circles here and there and was done.

Pretty Little Studio Products used:

Saturday, November 25, 2017

Scrappy Saturday- Love this guy/SpiegleMomScraps DT

Good morning everyone!! I'm here this morning to share a new layout with you. Y'all have probably already seen this sketch but thought I'd share it again to show you what I got my inspiration from.
I loved this sketch as soon as I saw it!! I started with a sheet of white cardstock, I lightly drew on a circle and grabbed Aint life Grand from my stash and started to punch out different sized circles.
I laid the circles I punched out around the circle I had drawn on, but wanted more circles, so I grabbed the circle stickers and die cuts from this collection and layered them in with the other circles. When I had them all where I wanted them I ran my page threw my sewing machine.

Once I had my circles stitched down and a few messy circles sewn, I grabbed my photo and added a few paper layers behind it. I messed up the edges some and then popped it all up on 3D foam, added a xoxoxo tab and stuck it down. I grabbed some word stickers from my stash and added them above and below my photo and moved onto adding my sequins! 

To finish my layout, I reached into my lovely basket of sequin packets and grabbed out Puppy Dog Tails and Hustle Bustle. The colors were perfect, so I started to add them around my sewn circles.  I loved the shine it added to my layout and the color pops it added to the top of my layout too! I decided to add a navy polkadot paper as a boarder around my whole layout and added a little Heidi Swapp gold color shine splatters and was done!
Thanks so much for checking out my layout and make sure to check out what all the other Sparklers make too!! Head over to the shop and check out all the new sequins too!!

Tuesday, November 21, 2017

Pinsperation-Hay Bear-Pretty Little Studio DT

Good morning everyone! 
Sarah here this morning to share another layout I made using some pretty products from Pretty Little Studios and along with a little pinterest inspiration! 
I chose to use colors on the lighter and brighter side, with a little black thrown in on my layout. I used the Potpourri collection for this layout, I loved the colors in the collection, they went great for a fall layout and thats what I was doing.
I had ordered the swatch pack and wanted to use them on this layout, so I pulled them out, chose the ones I wanted to use and started laying them out on my cardstock. I set it up in a pyramid shape with my photo at the top.


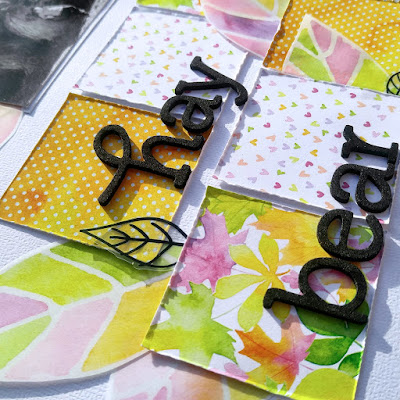
I grabbed the beautiful vellum paper, Pile of leaves out and did a little cutting, well I cut all the pretty leaves out and tucked them behind my photo instead of adding a bunch of layers. I tucked them behind some of the swatches at the bottom of the layout too. I liked the little bit of dimension that it added to the layout, I also decided to ruff up the edges of my swatches. 

To finish my layout I grabbed the Thankful clear word stickers and tucked some of the black leaves around the layout too. I added my title to the bottom with some thickers from my stash and did a little play on words. Then I grabbed some shimmerz and added some little dots around the cluster of leaves. And that finished it all off for me.


Pretty Little Studio Products used:

Saturday, November 18, 2017

Scrappy Saturday-Panda boy

Good morning everyone!! Im here this morning to share a layout I made based off this sketch!

I pulled out some Pink Paislee goodies from my stash and a goofy picture of one of my boys. 


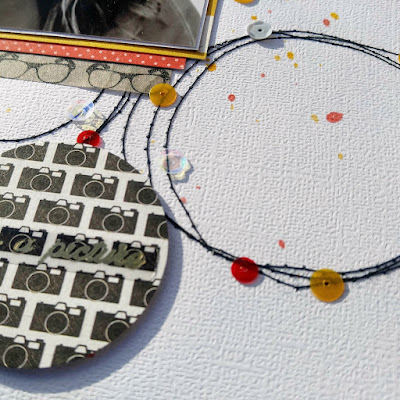
I loved the circles on the sketch, so the first thing I did on my layout was run my cardstock through my sewing machine with black thread. I sewed on a few messy circles and went to matting my photo.


I already knew what sequins I wanted to use and they went great with the paper collection I chose, so I decided to layer red, which I used a punch on and then added a layer of yellow behind it too. After I put my photo where I wanted it, I pulled out the washi, it was grey with some cute glasses on them and I thought since the picture of my son had cute little glasses that they would go great together! So I added that under the bottom of the layers.


I already knew what sequins I wanted to use, I Solemnly Swear, one of the new collections and they went great with the paper collection I chose, so I decided to layer red, which I used a punch on and then added a layer of yellow behind it too. After I put my photo where I wanted it, I pulled out the washi, it was grey with some cute glasses on them and I thought since the picture of my son had cute little glasses that they would go great together! So I added that under the bottom of the layers.


For my title, I decided to add it in to the sewn on circle to the left of my photo. I grabbed some foam thickers and some little yellow ones from Pretty little studios and named my layout, Panda boy. I added my sequins around that circle too along with some more metallic washi stickers and a flair button. And to finish it all off, I grabbed some of my shimmerz and did a little splattering and that was it!


Saturday, November 11, 2017

My Love-Scrappy Saturday/SpieglMomScraps DT

Good morning everyone!! I'm  here this morning to share a new layout that I made for the SpiegelMomScraps DT, scraplifting Rachel Lowel. She had so many great layouts to chose from, but since we had more of a circle theme going this month I chose one of her layouts that had a circle on it too!

Here's the layout of Rachels that I chose to scraplift:


I thought this was a beautiful layout and so sweet. I had the same collection in my stash so I thought I would use it as well. So I grabbed it from my stash and set it to the side. I already had the photos I wanted to use pulled too. Me and my hubby out and about one night.

I chose to make my cut file larger then heres, I wanted it to cover more of the background. So I cut this, to me what looks like a target with little hearts on it and backed it with a light blue cardstock. Then I adheared it to the middle of my layout.


As soon as I got the cut file backed and stuck down, I started layering papers behind my photo strip. I know Rachel chose to use one photo, but I decided to change it a bit and use a photo strip I made on my phone. I layered in papers and even some packaging behind my photo. I kept my photo to the bottom left of the die cut, like Rachel had and started to layer in some stickers.


Rachel had placed her title off to the right hand side of the photo and I followed her lead. I pulled out some of my foam thickers and added my title to the right of my photo. At this point I wanted to embellish a little more so I pulled out my 12x12 chipboard ephemera sheet and added a few hears and a little banner piece that said for you my love.


I grabbed my sticker sheet that goes with this collection and added a few more heart stickers and then went to my sparkalies!
I used a mix of Unicorns&Rainbows and Roadtrips&Sunshine. I thought they mixed well together and matched the colors in this collection so well!! I hope you liked this layout and I hope you come back and see what else all the other ladies make too!!


Friday, November 10, 2017

Extraordinary-Pretty little Studio DT

Good morning everyone!! I hope your week went good and that your looking forward to a good weekend too!
Well this morning I'm sharing a easy layout that I made using the Tales&Dreams collection again. Like I said on my last layout, I love the floral die cuts in this collection and I played with those again on this layout, along with some frames for layering.

I started this layout with a piece of white cardstock and a pencil. I drew a circle on the page lightly. I already knew what picture I was going to use. My daughter sitting at the park on some steps just cheesin it up, lol. But she was just to cute not to use this picture.
I pulled out my die cut packs and started to lay the flowers around the circle. Once I got them all laid where I wanted them, with the little leafs tucked in here and there,I ran them threw my sewing machine a few times. After I finished sewing them down, I grabbed my scissors and cut under all the flowers, right by the thread. I left the inside attached so I could build my mat for my photo.


 I added foam to the back of the flower wreath and pulled a stripped paper from my stash to mat it all on. Once I had that down I pulled out my frames and started roating the behind my photo. I knew I didn't want  a lot behind my photo, so I was happy with the little bit of color popping on all the sides. I added a tab to the top, along with a little word sticker, then pulled out the die cut words and pulled out extraordinary and places it across the empty spade to the right on my photo. 


That was it for me for this layout. I wanted to add a little journaling about that day and about her, but I didn't want to have it on the front of the layout. I didn't want anything to take from the picture or the pretty flowers, so I decided to journal on the back. Its still there, it can be looked back on and read but isn't visible to everyone. I hope you liked this simple layout and I hope you go check out the new collections in the shop!! And there are always more to come!!

Pretty Little Studio products used:

Saturday, November 4, 2017

Cat Girl / Shimmerz Paintz

Good morning everyone! 
This morning Im sharing a layout I made with some beautiful Shimmerz products and some of the September release from SpieglemomScraps 


I wanted to try another way to do a background using my mists, so I spritzed the colors I wanted on a circle pieces of cardboard I had in my stash, it had a white coat over the cardboard so I thought it would be fun to see how it would do transferring it to a piece of paper. So once I has the colors sprayed, I spritzed it with some water and then layed my cardstock on top of it. Some of it looked more saturated then others, but I loved the way it looked and that it actually left a circle shape. 


Once that dried I pulled out my sewing machine and added some stitching around the circle in black and started playing with my sequins! I mixed Painted Garden, Aquarius and Fairy Garden and added them all around the stitched circle. The colors of the sequins were a perfect match for the sprays I used and it looked amazing!


I figured at this point I needed to chose photos and a collection to use, lol. I never start a layout this way, but it was fun to do it all backwards for myself! I pulled some pics from Snap chat and matted them to look like a photo strip and started layering papers that matched the background.


I pulled out some frames and since I had cat ears in my pictures I decided I was going to use some of the cats from my stash. It also gave me my title. A little goofy, but I chose cat girl, lol and instead of using the word for cat I added the stickers and chipboard cat faces.

I added a few strips of paper to the left of the layout and added some more of the cats there and added in some of the star stickers and at this point I was happy with the way my layout looked and stopped. I have the habit of keeping on adding more and more embellishments! lol, so I stopped myself and that was it for this one!
And remember. when your checking out over at Shimmerzpaints.com make sure to add my name in the comment section and get a free gift with your purchase!!

Scrappy Saturday-Good Vibes- SpiegleMomScraps DT

Good morning everyone!! I hope your having an amazing weekend, we've had a long weekend here and the kids have been having a blast! Our weather has went from freezing to in the 80's again lol, our weather cant decided what it wants to do here! 
But on to the scrapping and pretties!!
This month were playing with circles and this is the sketch were playing with this week. I love playing with sketches and circles are a fun switch up too!! I have to be honest, I usually stick with squares and rectangles, so its fun to break out of my norm. 

I loved this months new sequins and I really wanted to play with the Dream Land mix. I want to play with them all but I dont know what a layout would look like with ALL of them on there lol. Anyways, I went through my scrappy stash and pulled out what I had left over from the Girly and strong kit from The Fairy tale club. The kit had everything but the purple in it, and I hate that I didnt use the purple cause its one of my favorite colors! But all the other colors matched!!! And I was so happy about that!
I started out playing with a little Shimmerz on the background. I used Spritz Cotton Candy, Dazzlerz Sea U in the morning and splattered a little Shimmerz Bumbly Bee on there too! I do have to say that I am loving Bumbly Bee, its amazing! The shimmer to it is fantastic! Anyways, back to it. After I let the background dry, I sewed four circles on the background in black thread and then started the layering.
Usually I wait to put my sequins on last but this time I started with them! I pulled out my sequins and started placing them around my sewn circles. I wanted to play with them so bad and loved the way they sparkled!! After I placed them down, I thought I should probably get some pretty paper and pictures put down. So I pulled out some pictures of me, of course playing with snapchat again,lol.

I pulled out some doilies from my stash and laid them in my sewn circles and started layering behind my photos. The papers were bright and fun and I loved the way it was coming together. I had already used all the embellishments that came with the kit so I had to make my own, so I pulled one paper that had pretty roses on it and another that had lip stick on it and started to fussy cut!

For my title, I pulled out a Dear Lizzy die cut word and added some cotton candy Spritz, then added it onto of my doily. Then tucked in a large lipstick for fun and a pretty flower.


I finished the layering behind the rest of the photos, cut down the white cardstock and added the light blue, blue striped paper to the background and was done. 
I hope you play along this week with this sketch and make sure to share on instagram and tag Spieglemom_scraps in it!! We'd love to see what you create!! And remember when your checking out at Spieglemom Scraps, make sure to use code SARAH15 when you check out to get 15% off your purchase!

Dare to dream../Pretty Little Studio DT

Good morning everyone!! I'm here this morning to share a new layout made with the Tales & Dreams collection and oh man is this collection beautiful!! 


With this layout, I chose to focus on the floral ephemera packs. I mean look at those flowers!! Who could not want to play with those!! I wanted to play with a diagonal on this layout. So I started by lightly drawing 2 diagonal lines across the page that I knew would fit my picture in. I didn't even mat my photos, and I always mat my photos! 
After I drew my lines on I added some Shimmerz in between them, let them dry and started playing with the pretties.

I started laying out my flowers on the lines I had drawn, They looked beautiful, but I wanted to add a little something else in , so I grabbed my label pack and slid them in over a few of the flowers. When I got those where I wanted them, I ran my sewing machine across them a few times, with black thread.
I added my photo in to the top right of the diagonal, I tucked a tag behind one side of the photo and a tab on the other side. I just wanted a little color added behind the photo and a little layering. I pulled out a word die cut pack and made my title.

I remembered I had the clear leaf stickers so I thought it would be a nice touch tucked in here and there and bring in some more of the black from the thread and the photo.
I splattered a little more shimmers and that was it for this layout! Thanks so much for stopping by to check out my layout and make sure to head to the store and look at the new collections!!
Pretty Little Studio products used: